Table of Contents
Why Self Hosting With Abstruse?
So there are free CI solutions like CircleCI, but their free tier will be used up rather fast. It has also been noticeably slower than any self-hosting solution, using their free tier. I also like that I have 100% access to all the code and hardware it's running on.
Abstruse is a very minimum, lightweight, and easy setup. There is a lot to
desire, but it's enough to get working for testing and deployment. They are working on a 2.0 version, but no ETA on
it (2.x is released!).
There are other solutions out there like Concourse, Drone, Agola, and of course Jenkins. Abstruse 1.x is programmed in
NodeJS and Angular, both things I am comfortable to jump into and make changes as needed. It also runs on Windows (
Docker required) as some of these others require Linux/MacOS specific features.
NOTE: This is for Abstruse 1.x and not 2.x
Installing Abstruse
So one big requirement for most of the CIs is having Docker installed. If you're on Windows then you'll need a CPU that supports Visualization and Windows 10 Pro. Also, since I'll be using GitHub, you'll need a way for GitHub to talk to this install. It's not an absolute requirement, but then you'll be stuck running builds manually after a commit.
Okay, so let's go ahead and install the application via Docker, here are the commands you'll need.
# Download Docker image
docker pull bleenco/abstruse

# Make Folder - Linux or MacOS
mkdir ~/abstruse-config
# Make Folder - Windows
mkdir %HOMEDRIVE%%HOMEPATH%\\abstruse-config

# Run Abstruse
docker run -dit --restart always -v /var/run/docker.sock:/var/run/docker.sock -v ~/abstruse-config:/root/abstruse -p 6500:6500 bleenco/abstruse
Setting Up Abstruse
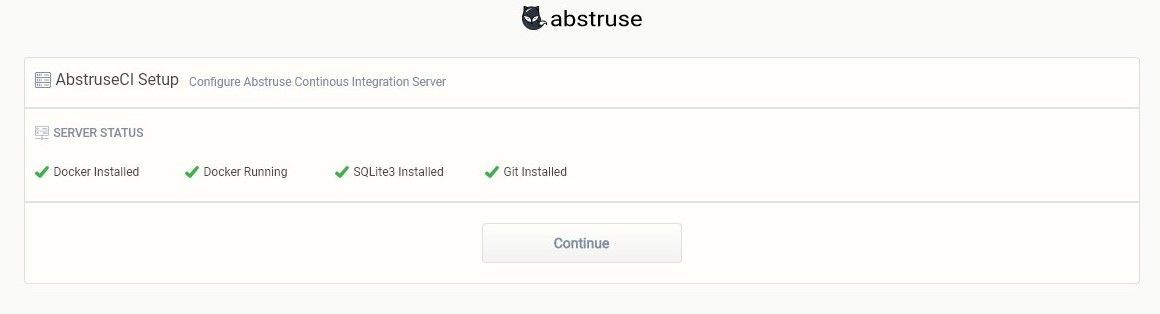
Now you can access the their setup panel from where ever its hosted. So it could be http://localhost:6500 or access it from whatever domain your server is connected to i.e https://montanez.dev:6500. You should see Abstruse running with all items checkmarked
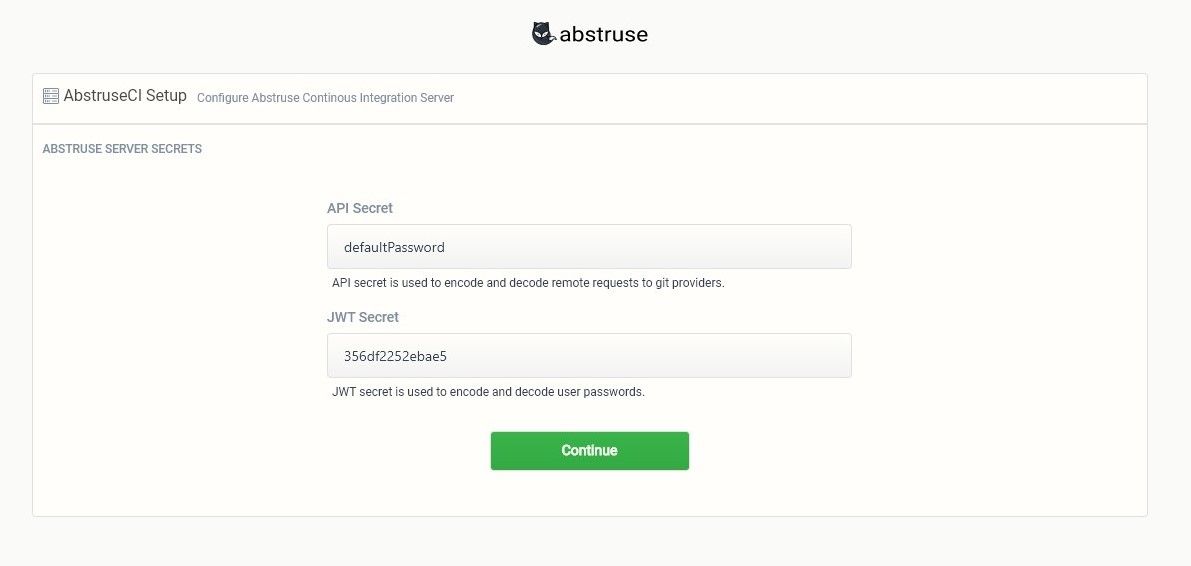
Go ahead and click on continue, and then you'll be present with the "ABSTRUSE SERVER SECRETS" screen. For now just make sure you change defaultPassword to something else and keep these in a safe place. You'll be using the API secret shortly, so don't lose it.
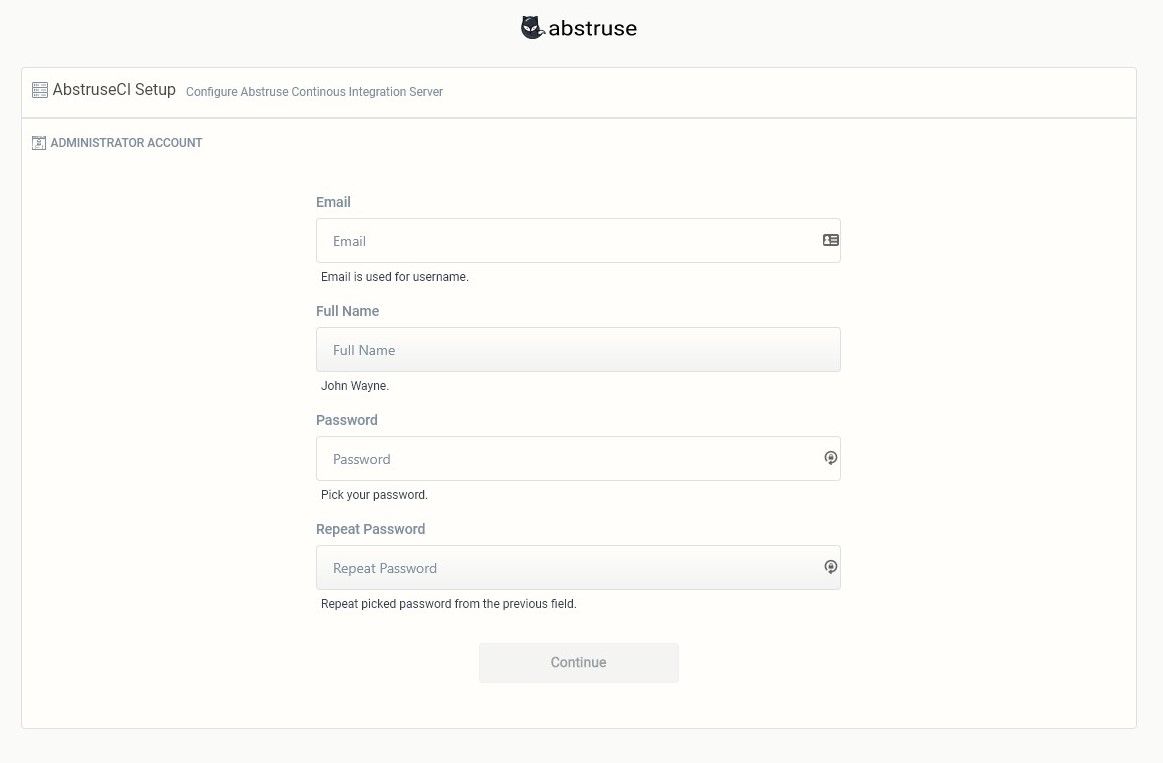
Now go ahead and create your admin account. Again keep your password safe, you'll use this shortly.
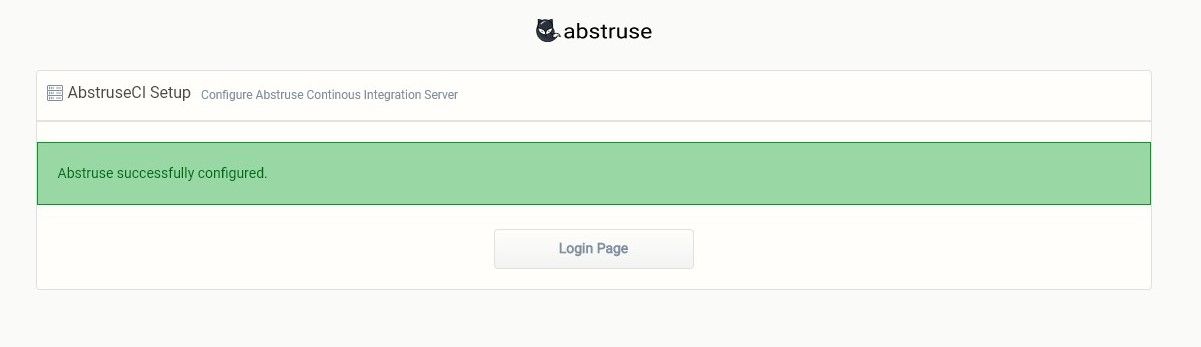
Now you should be good to go, you'll be presented with a green success notice. Go ahead and click the login page button
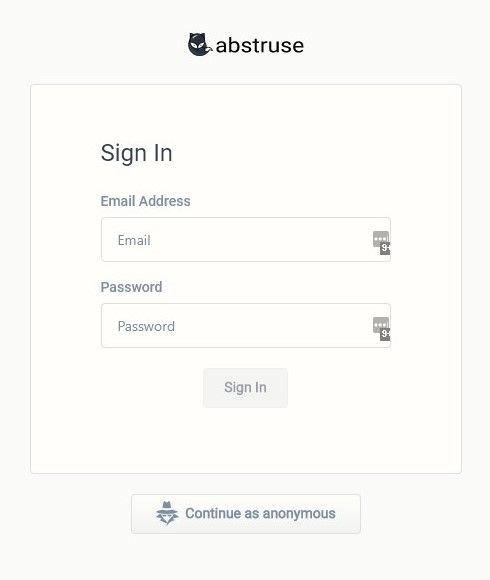
Now you can sign in with your admin account.
Setting Up Docker Images For PHP
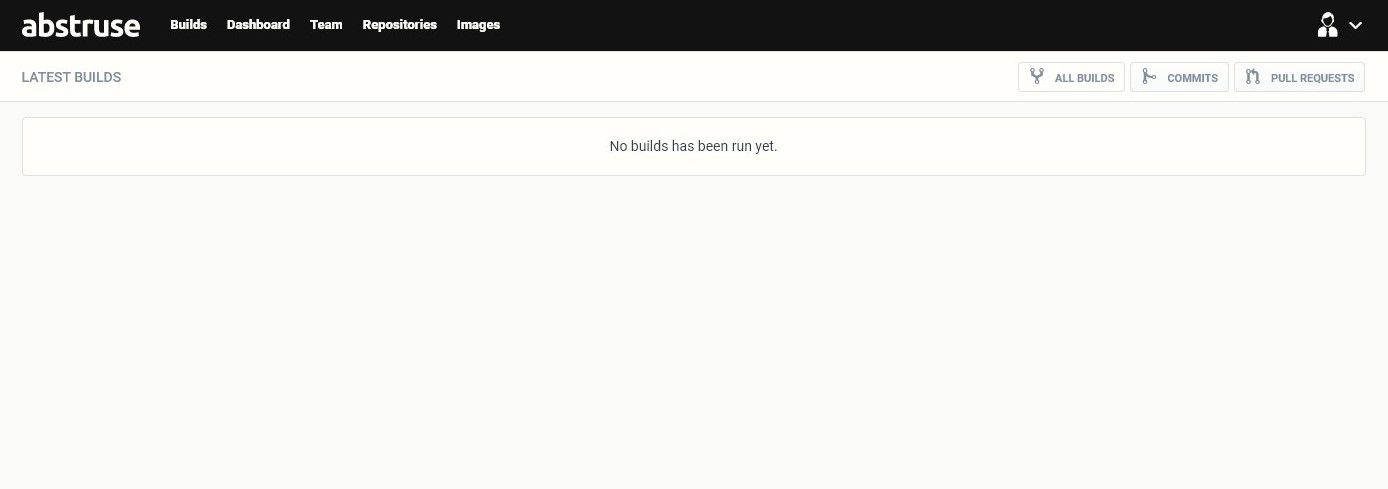
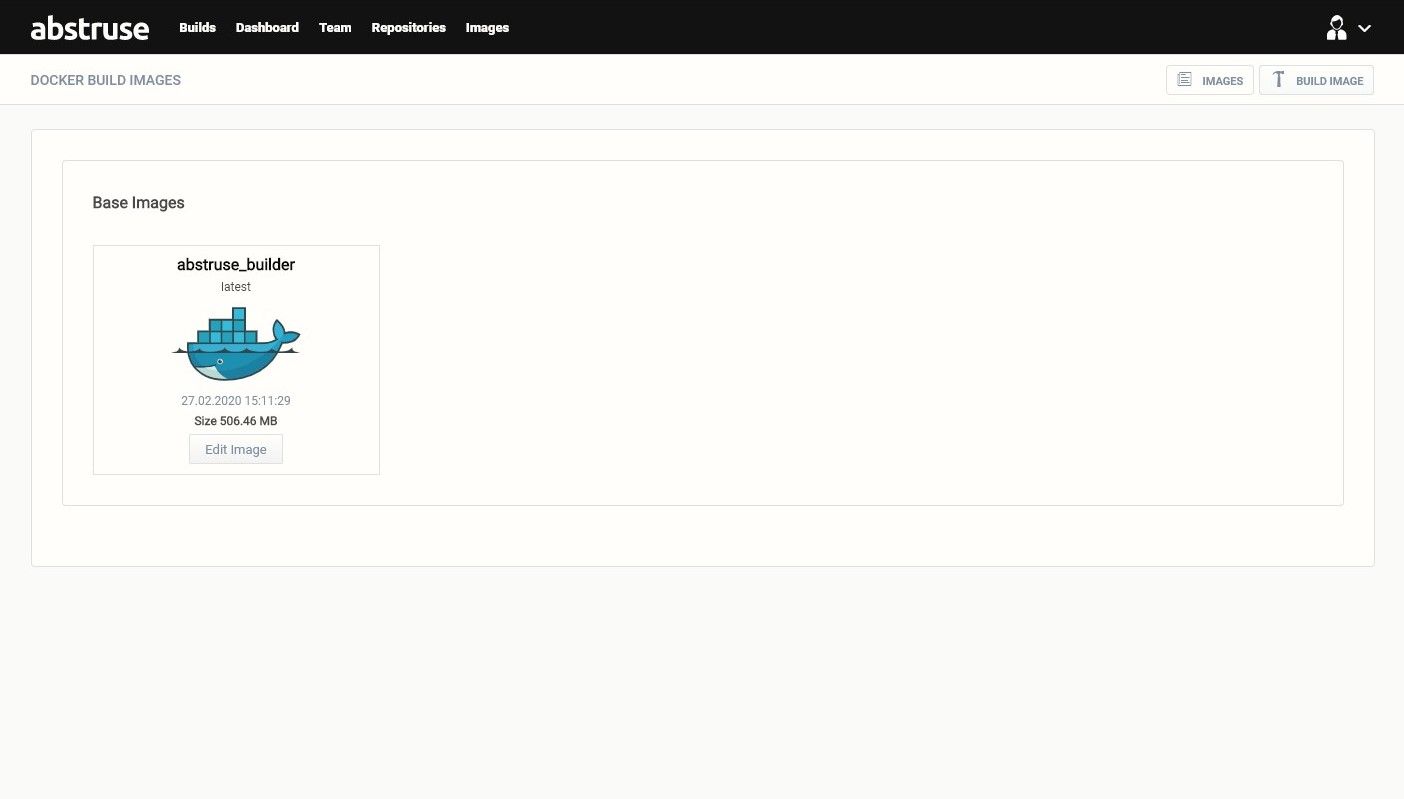
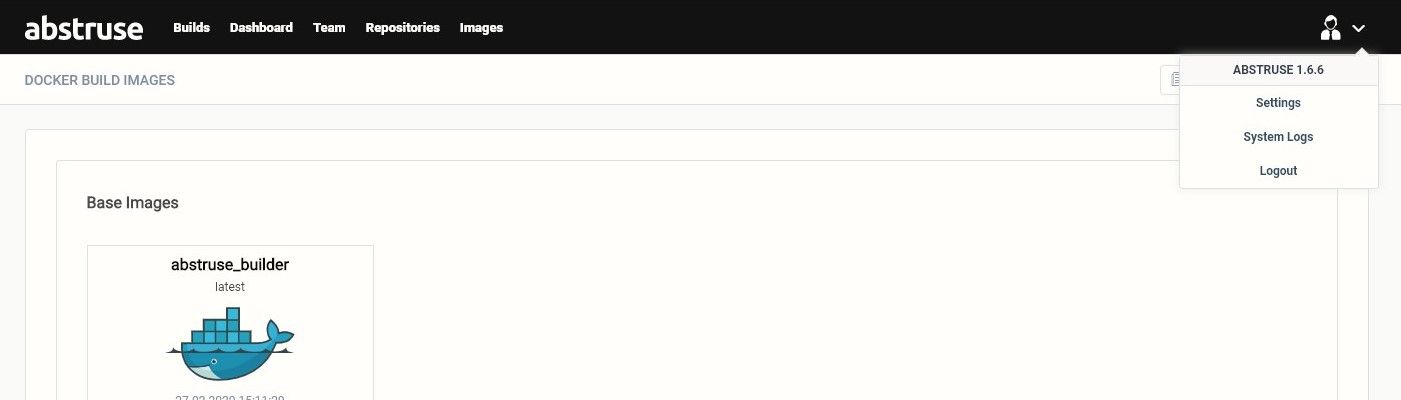
After you've signed in you are greeted with an empty dashboard. Go ahead and click on Images.
You'll see we have no base images, so let go ahead and click on Build Image

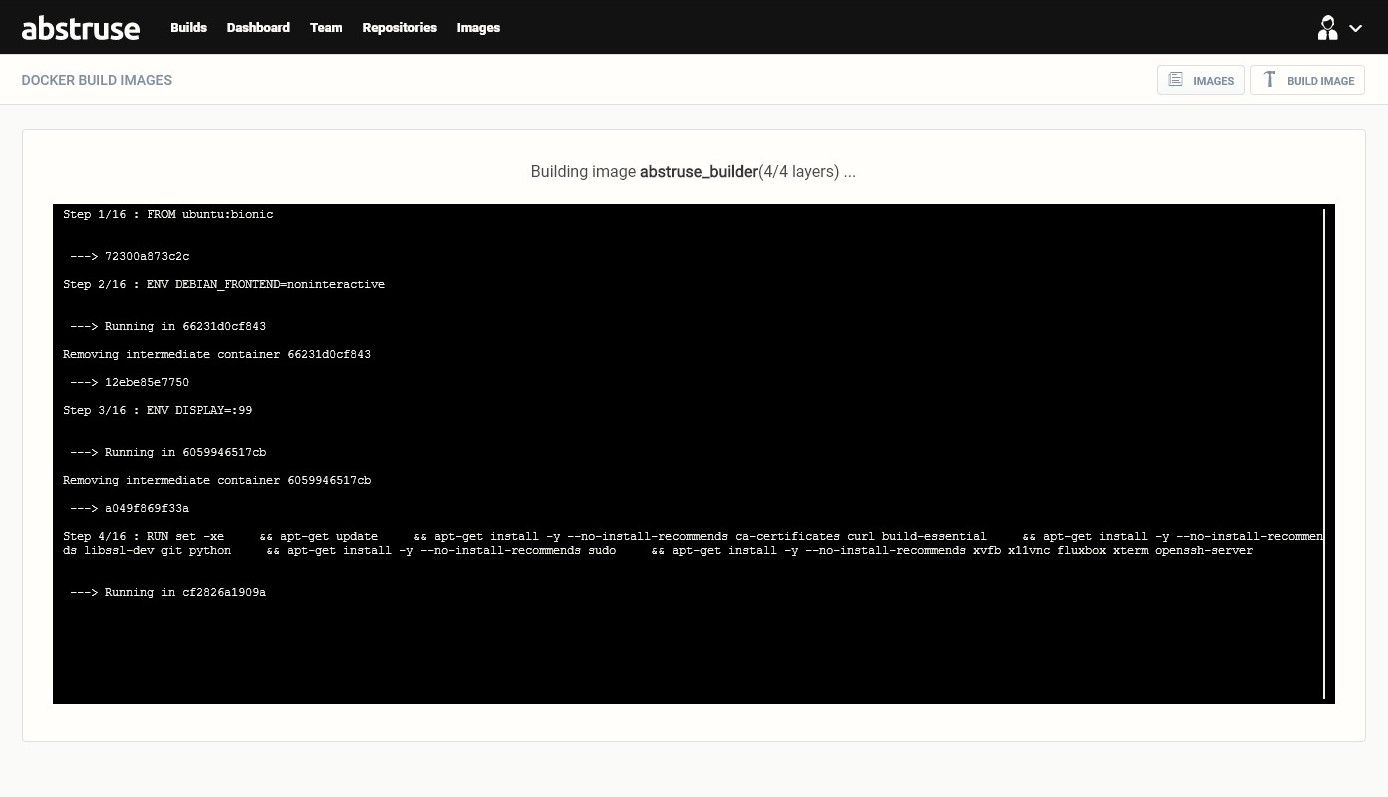
We will leave the default settings here as is, to make things simpler. You can always create more base images, so you want to use Alpine, or another base, then you can, but you'll have to add in the code to get SSH and Remote Desktop access. Click on Build Image to start installing the base image.

So this will take a while, so grab a snack or some coffee. If you're running Ubuntu 18.04 under all of this, it should only take a minute or two.
Okay now that our base image is setup, we'll want to proceed with our custom image. Click back on Build Image.
From here lets give the Image name something like "php7_3", this is our Docker image name. You can
leave Image Type and Base image as is.
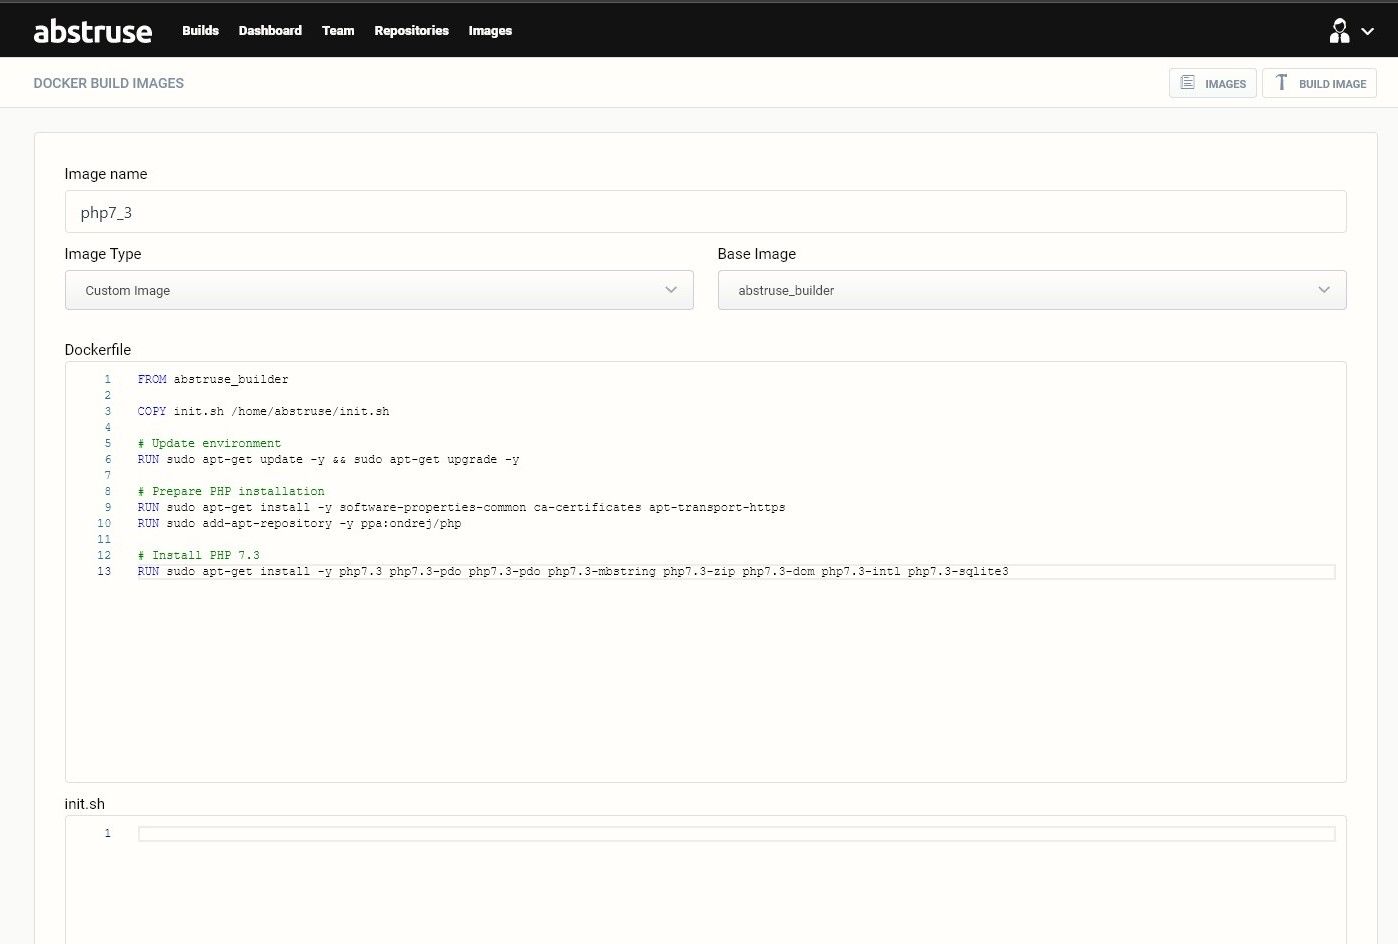
The base image is Ubuntu 18.04 LTS so we can use the PPA for PHP, Ondrej. Let go ahead and put in the following code for the Dockerfile and remove everything from init.sh as its not needed for this. We won't be setting up NVM for NodeJS so we don't need this part.
Dockerfile
FROM abstruse_builder

COPY init.sh /home/abstruse/init.sh

# Update environment
RUN sudo apt-get update -y && sudo apt-get upgrade -y

# Prepare PHP installation
RUN sudo apt-get install -y software-properties-common ca-certificates apt-transport-https
RUN sudo add-apt-repository -y ppa:ondrej/php

# Install PHP 7.3
RUN sudo apt-get install -y php7.3 php7.3-pdo php7.3-pdo php7.3-mbstring php7.3-zip php7.3-dom php7.3-intl php7.3-sqlite3
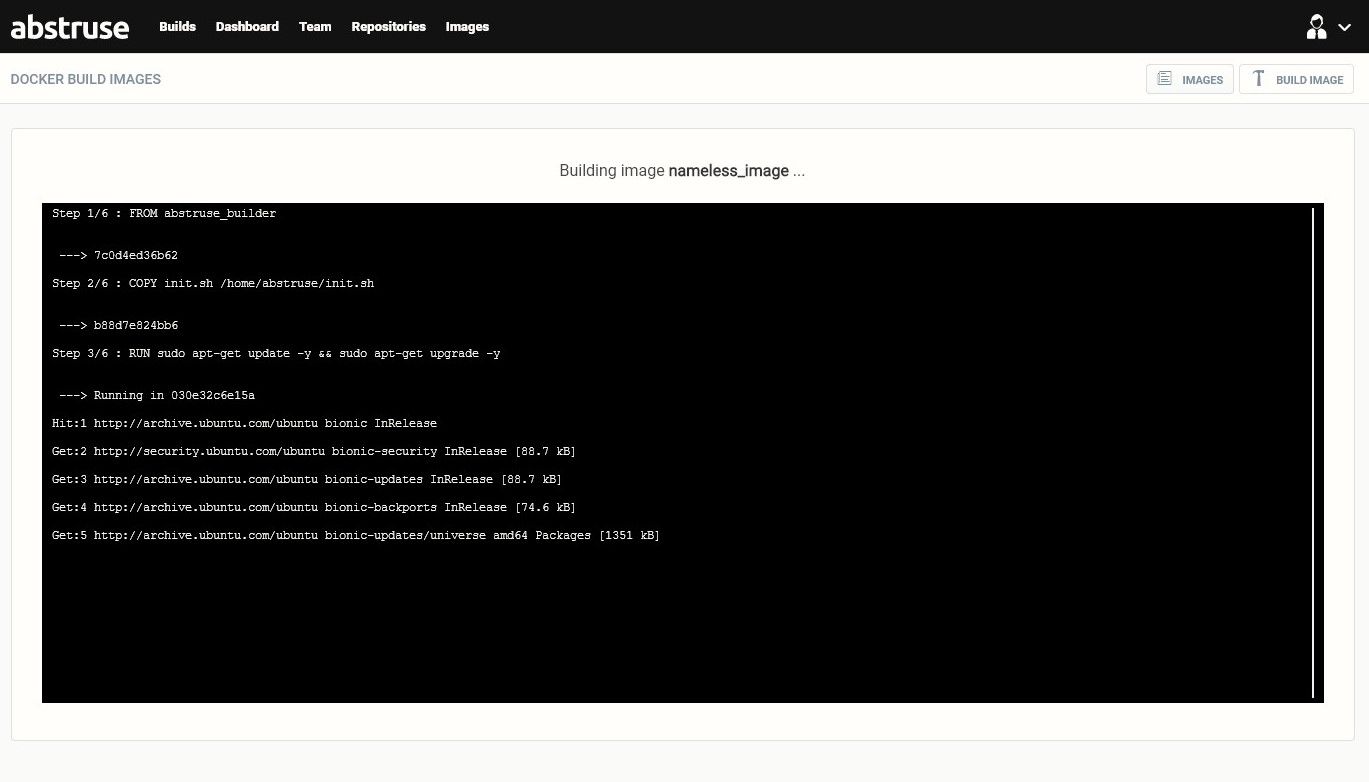
Once you've pasted the Dockerfile go ahead and click Build Image. You should see a black box with text like when
building the base image. This will also take a while as it uses your base image to add PHP to it. Now if you see a black
screen for a split second, or it just tosses an error. Then there isn't a good way to know why. I'd recommend building
your custom images outside of Abstruse and find the Dockerfile errors from there. Abstruse logging is very limited and
won't tell you what's wrong.
Creating An Access Token From Your GitHub Account
Please note that a free account with ngrok, means the address changes every time. If you don't want to keep editing the webhook, then consider the $5.00 a month for ngrok, or look into GitHub Actions with a self-hosted runner.
Okay now we are at the point of setting up an access token! Go to Github and access
your settings.
From there click on Developer settings.
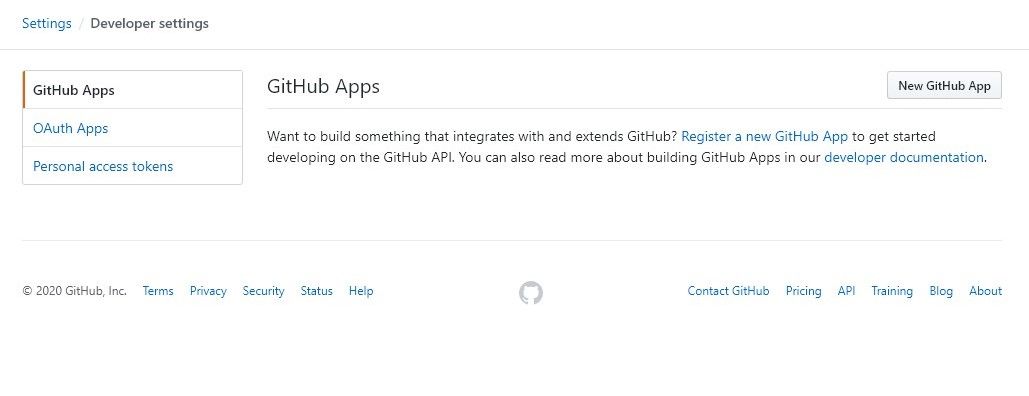
You should see Personal access tokens, go ahead and click on that.
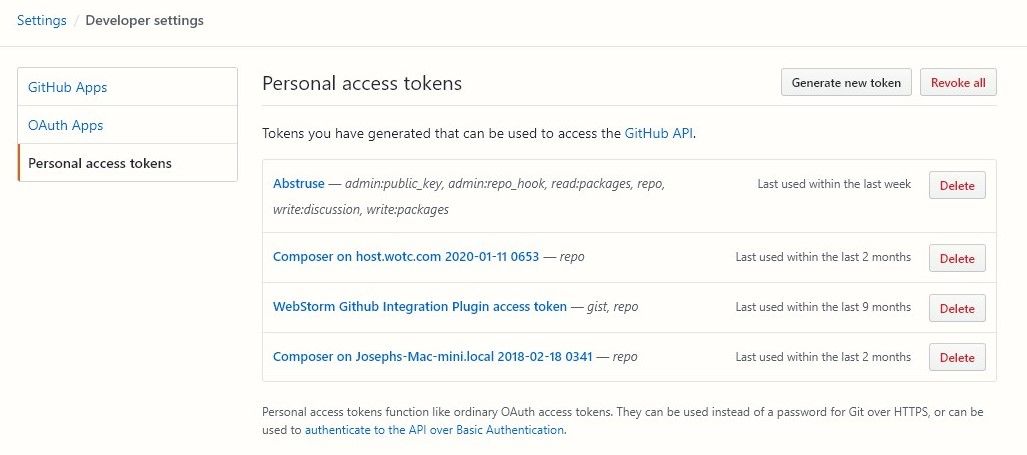
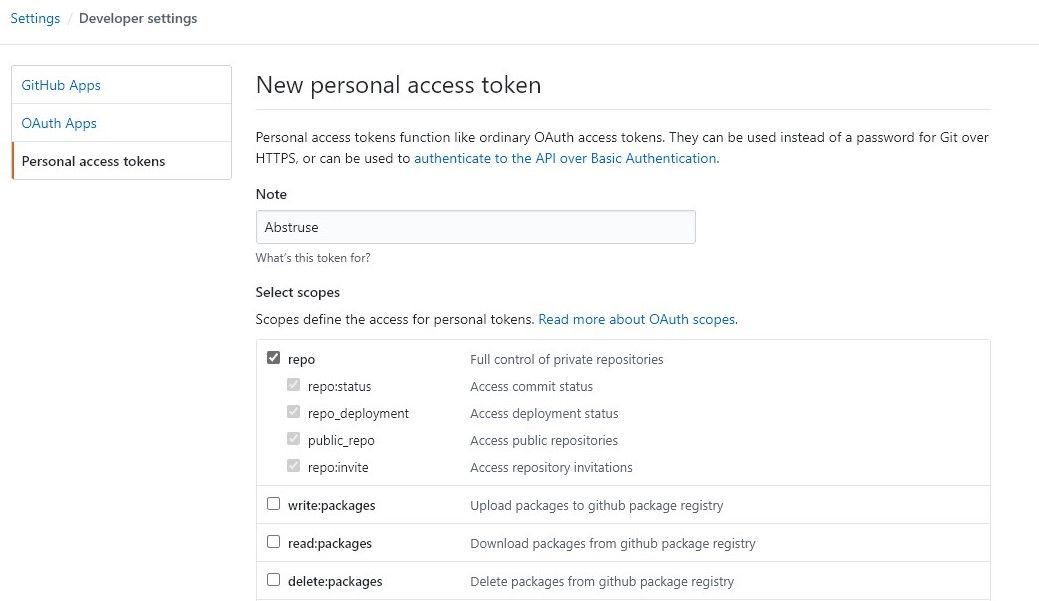
Here is where you can now click on Generate new token. For the personal access token you only need repo access, the
other permissions are not needed. Also give it a note, this way its not lost when you have too many access tokens. After
things are set, scroll to the bottom and click Generate token
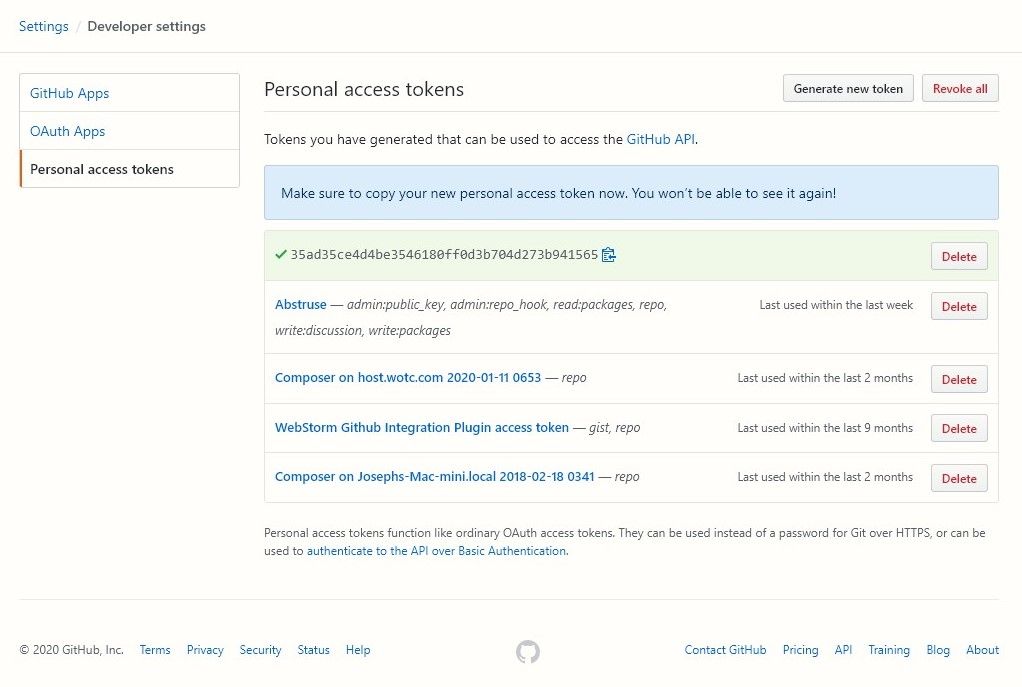
Now, you'll see the access token in a blue box on top. Be sure to copy that as it will be pasted into Abstruse.
Lets head back over to Abstruse and go to settings.
Go ahead and click on Access Tokens
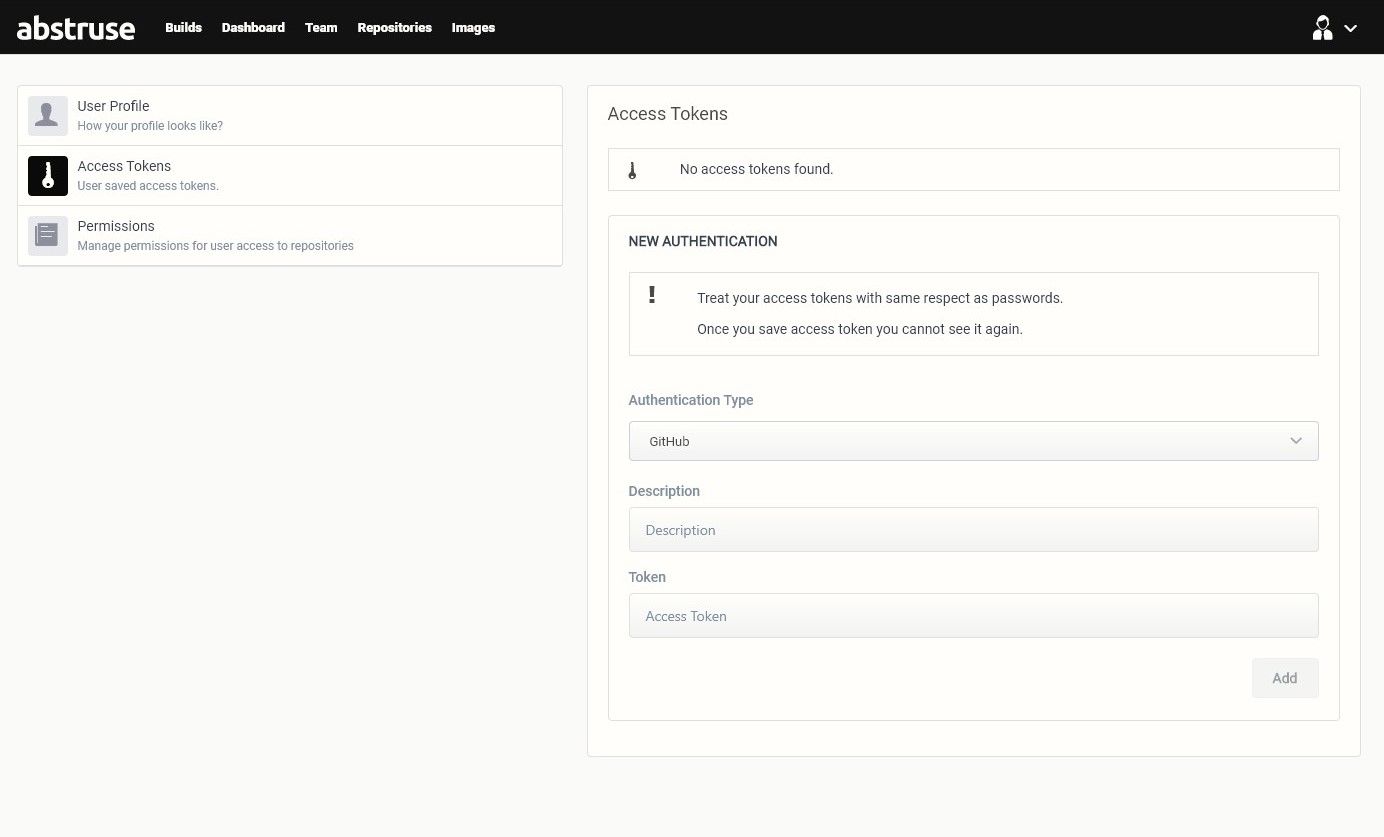
Paste in your access token from Github into the Token field.
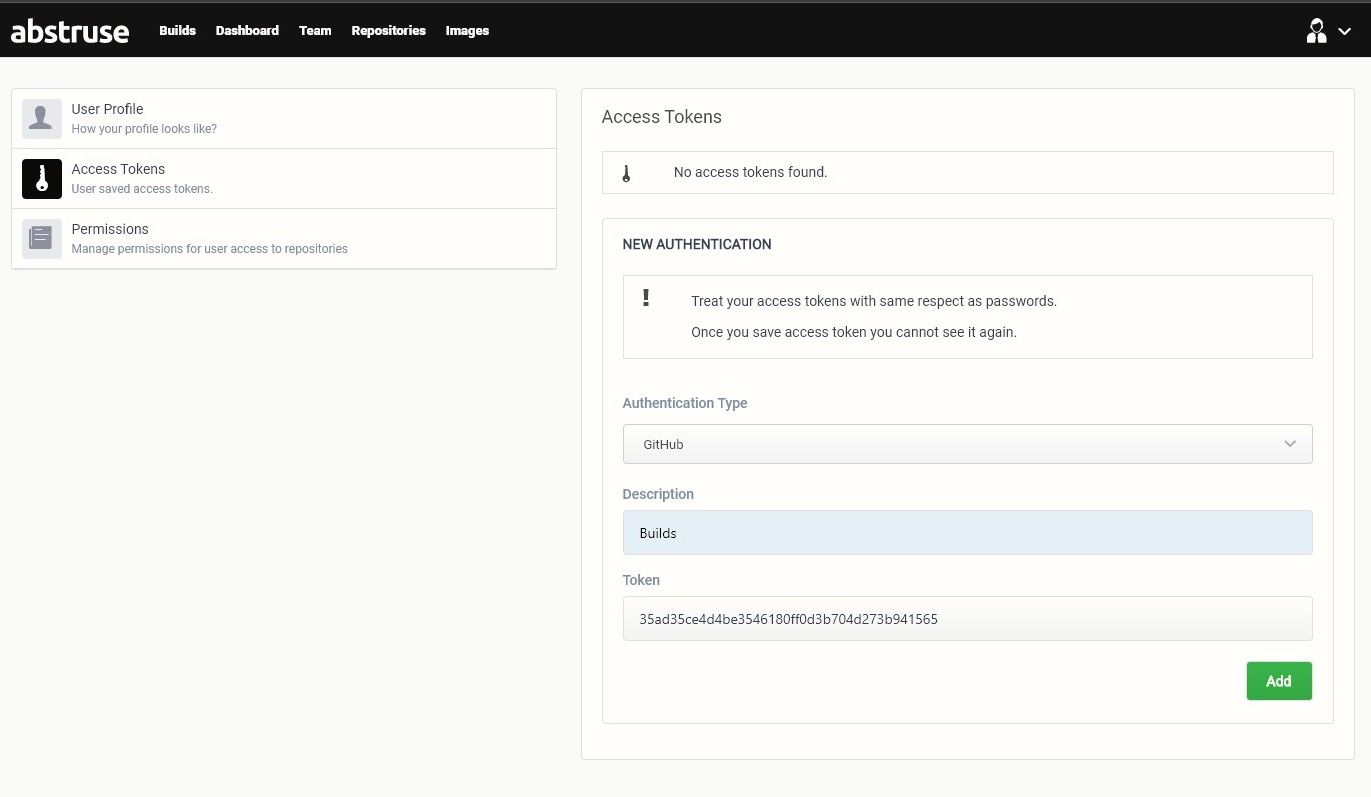
Great! Now we also need to do one more configuration, adding a webhook.
Adding Abstruse Webhook To Your GitHub Repository
Okay so before we begin you need to decide if you are hosting Abstruse on a public network, like your own web server, or a private network such as a localhost. If you are using a private network and cannot use https://ngrok.com, then you can look into Github Actions via "Self Hosted", but GitHub Actions is for another time.
Running On Localhost
If you can use ngrok then head over to https://ngrok.com and create a free account, download the application and run the following commands
./ngrok authtoken YOU_AUTH_TOKEN_HERE

./ngrok http 6500

# Your webhook will now be something like http://c697ea84.ngrok.io/,
# but still need the suffix so it will be: http://c697ea84.ngrok.io/webhooks/github
Right, so lets go to your GitHub repository, then go to your repository Settings and then Webhooks. When you are
there
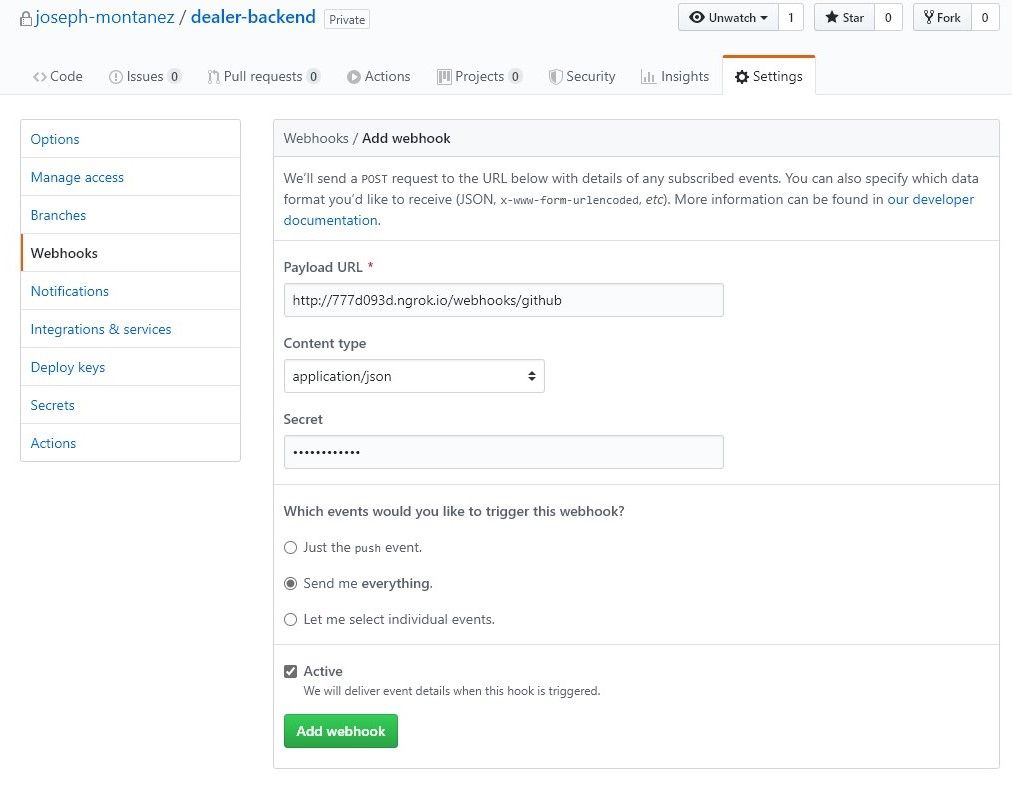
click on Add webhook.
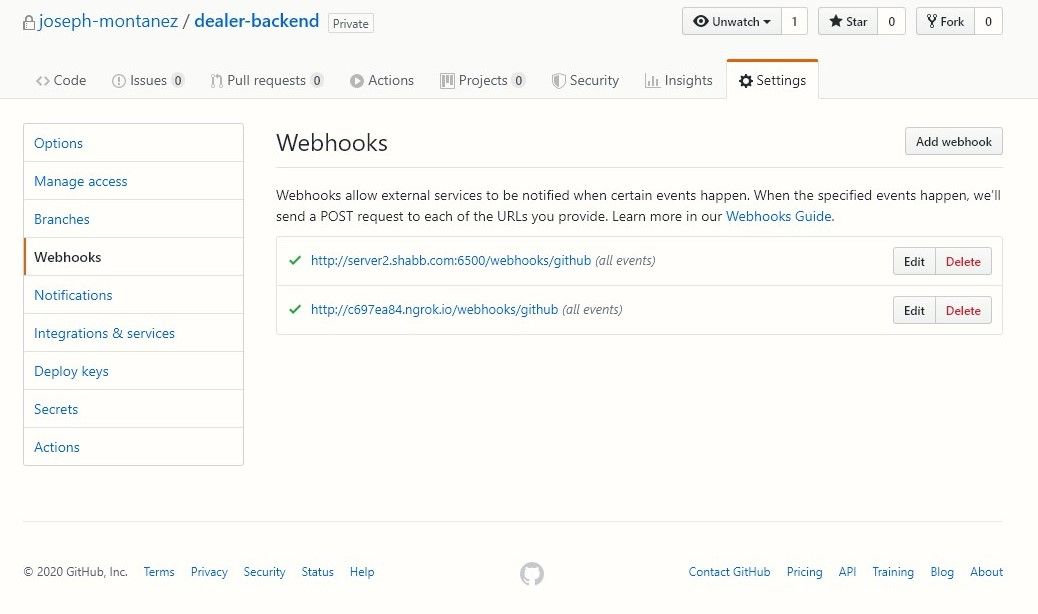
Now time to enter the information from your installation.
Payload Url: http://example.com:6500/webhooks/github
Content type: application/json
Secret: YOUR_API_SECRET_FROM_FIRST_INSTALL_SCREEN
Events: Send me everything
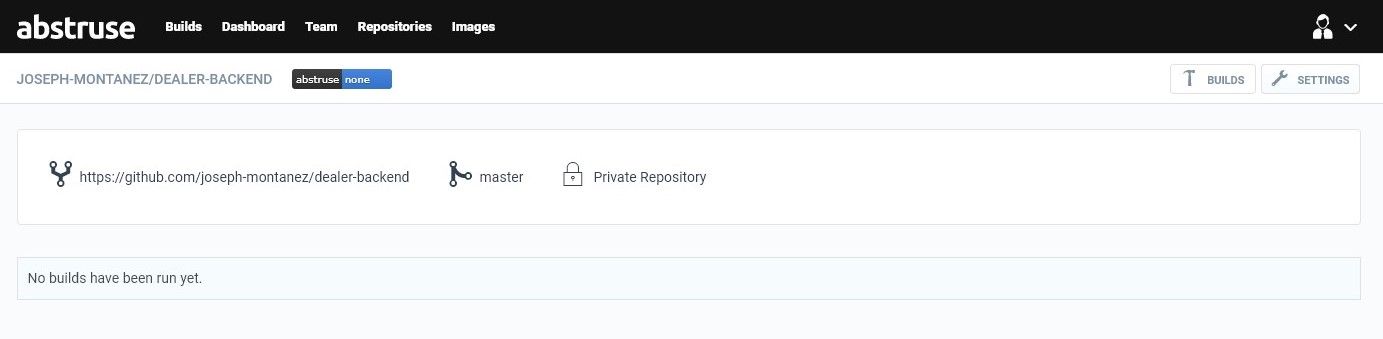
After the webhook is added, Github will ping the webhook (Abstruse) and Abstruse will add this repository to your list of repositories within its service.

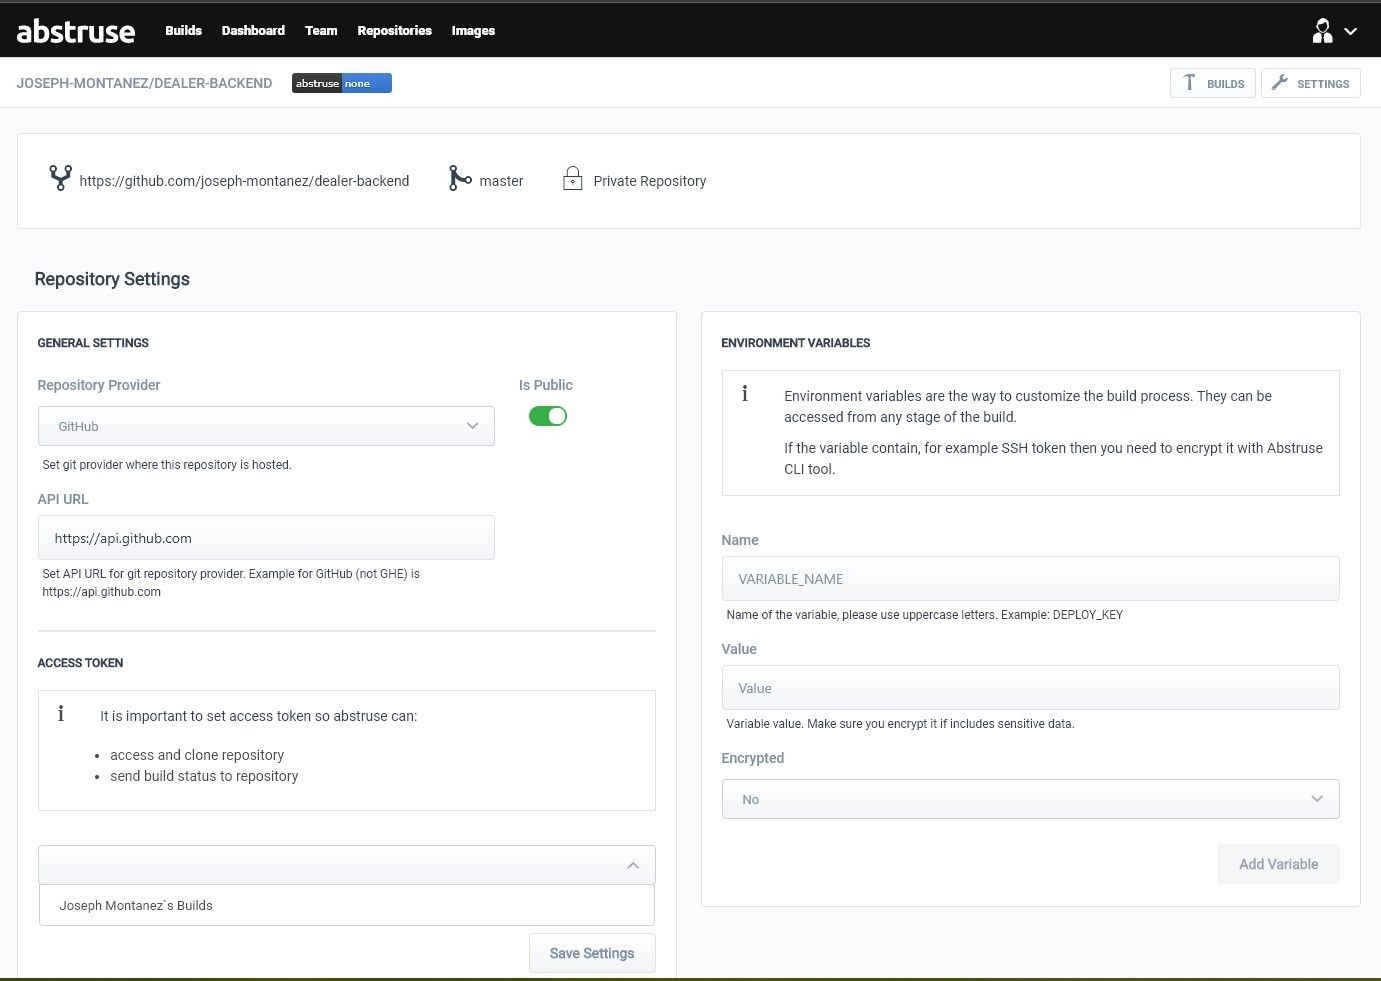
Now in order for commits to trigger the CI to do a build, we need to set the Github Access Token to the repository
settings within Abstruse. Click on your repository to see your page.
Now under Access Token, click the dropdown menu and select the access token.
We need to setup a YAML file to tell Abstruse how to build and run your project. Create a file at the base of your
project called .abstruse.yml. Be low go ahead and copy the following code into the file. A key part to this will be
the
matrix, this tells composer what script to run.
# .abstruse.yml
image: php7_3
cache:
  - vendor
branches:
  - master
matrix:
  - env: SCRIPT=test
before_install:
  - php -r "copy('https://getcomposer.org/installer', 'composer-setup.php');"
  - php -r "if (hash_file('sha384', 'composer-setup.php') === 'e0012edf3e80b6978849f5eff0d4b4e4c79ff1609dd1e613307e16318854d24ae64f26d17af3ef0bf7cfb710ca74755a') { echo 'Installer verified'; } else { echo 'Installer corrupt'; unlink('composer-setup.php'); } echo PHP_EOL;"
  - php composer-setup.php
  - php -r "unlink('composer-setup.php');"
install:
  - php composer.phar install --no-interaction
script:
  - php composer.phar $SCRIPT
The project's composer.json also need to be edited to include the test command from the matrix setup.
...
"scripts": {
...
"test": [
"@php artisan config:clear",
"phpunit --configuration phpunit.xml --debug"
]
}
...
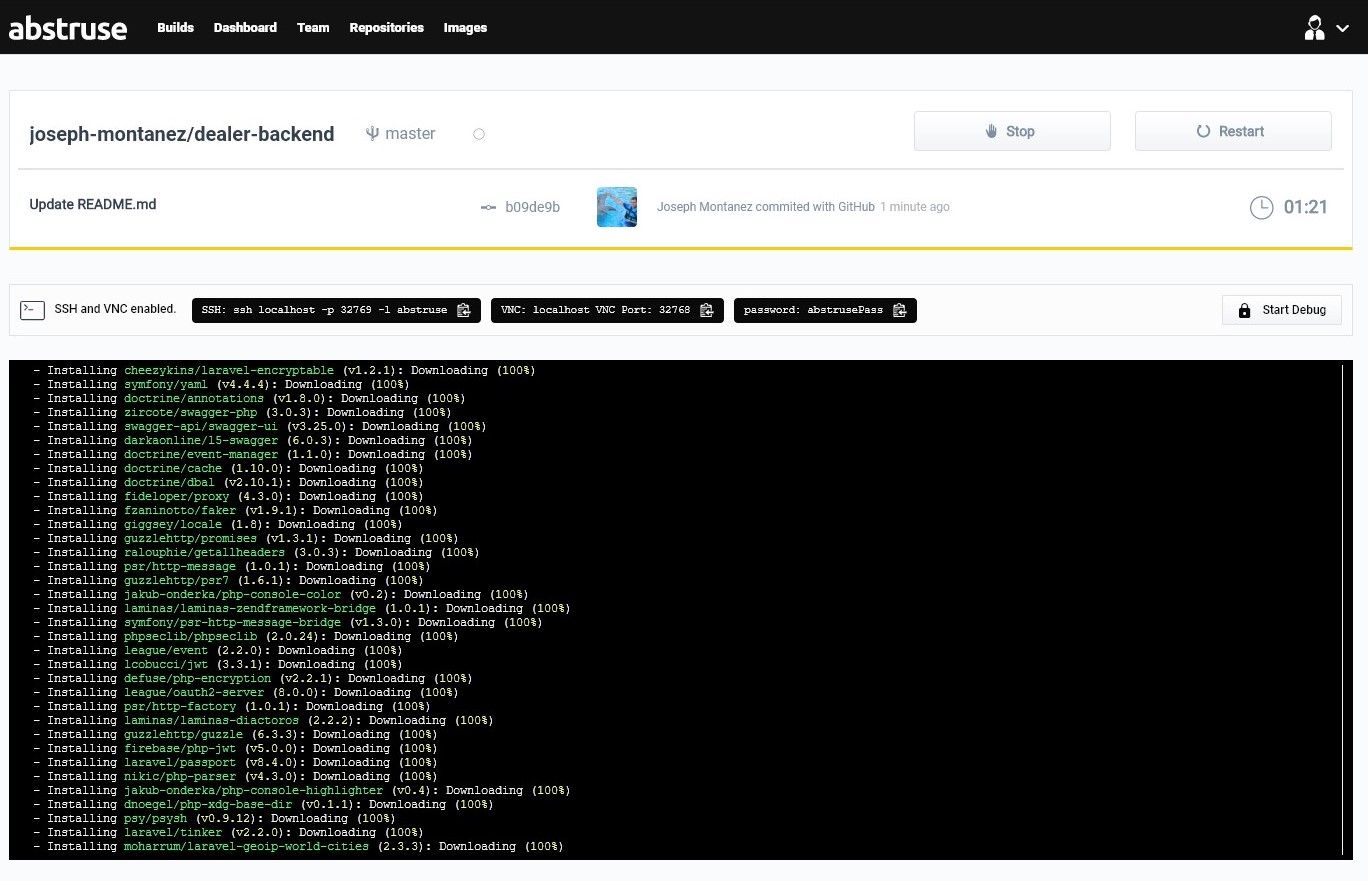
Great, now go ahead and commit/push! This will kick off your first build. You can click into the build, to see what going on, in case you there might be an issue running the test. That's it, from here be sure to look into Abstruse on how to do automatic deploys after a successful test.